File Upload Control
Use
The File Upload control is used to upload and attach files to the application.
Considerations
- Storage: A single File attribute can store multiple files.
- Maximum File Size:
- Defined in the Environment Configuration, but can be customized per control.
- Maximum Number of Files:
- Define how many files can be uploaded in one File attribute.
- File Validation:
- Specify valid file extensions for uploads.
- Enable a send as attachment icon for sending files via email.
- File Scope:
- Uploaded files are tied to the specific case. They cannot be viewed or shared between cases.
- Persistence:
- Changes (upload or delete) are saved automatically to the activity's scope.
Important Note: If users navigate back in the Work Portal and return to the activity, their changes persist.
Related Attribute Types
This control is associated with File type attributes.
Properties
Below are the exclusive properties for the File Upload control:
Advanced Tab
| PROPERTY | DESCRIPTION |
|---|---|
| Allow Delete | Enables/disables the option to delete uploaded files. |
| Max Files | Defines the maximum number of files that can be uploaded. |
| Valid Extensions | Specifies allowed file extensions for uploads (e.g., doc; xls; png). |
| Maximum Size (bytes) | Sets the maximum file size allowed for uploads. The smaller limit between this property and Environment Configuration applies. |
| Enable "Send as Attachment" | Displays an icon for users to send the file as an email attachment. |
Data Storage Conversion Table
| MEASUREMENT | BYTES |
|---|---|
| 1 KB | 1,024 bytes |
| 1 MB | 1,048,576 bytes |
| 1 GB | 1,073,741,824 bytes |
Example
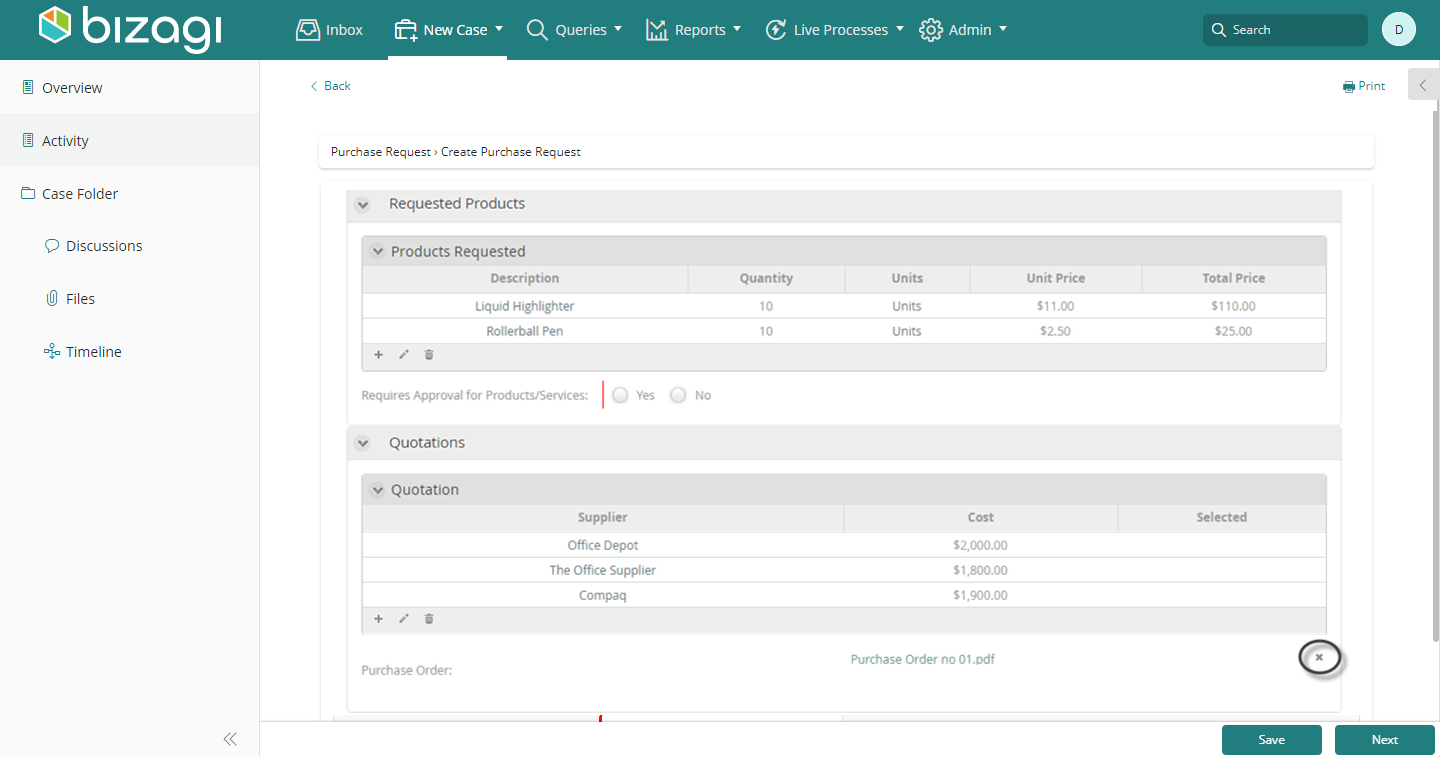
In a Purchase Request Process, end users need to upload a Purchase Order after approval.
Scenario Requirements
- Only one file can be uploaded to avoid duplications.
- Files must be in PDF format.
- Maximum file size is 2,000 bytes.
- Allow users to delete files in case of mistakes.
Steps to Configure:
-
Create a File-Type Attribute:
- Create a file-type attribute related to the Process Entity, e.g.,
Purchase Order.
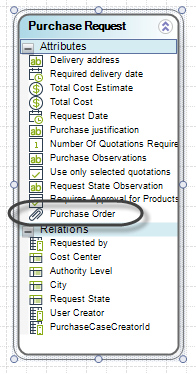
- Create a file-type attribute related to the Process Entity, e.g.,
-
Add the Attribute to the Form:
- Drag and drop the file-type attribute (
Purchase Order) from the data model onto the form. It will appear as a File Upload control.
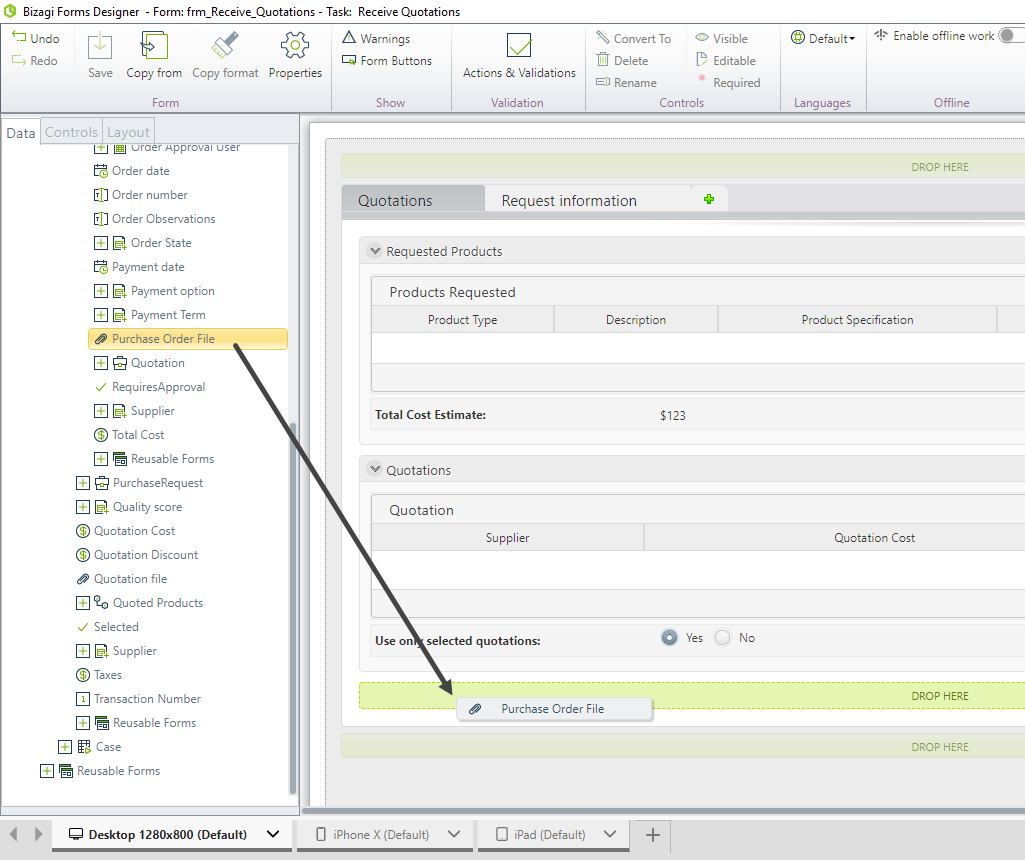
- Drag and drop the file-type attribute (
-
Limit Uploads to One File:
- Go to the Advanced Tab and set Max Files to
1.
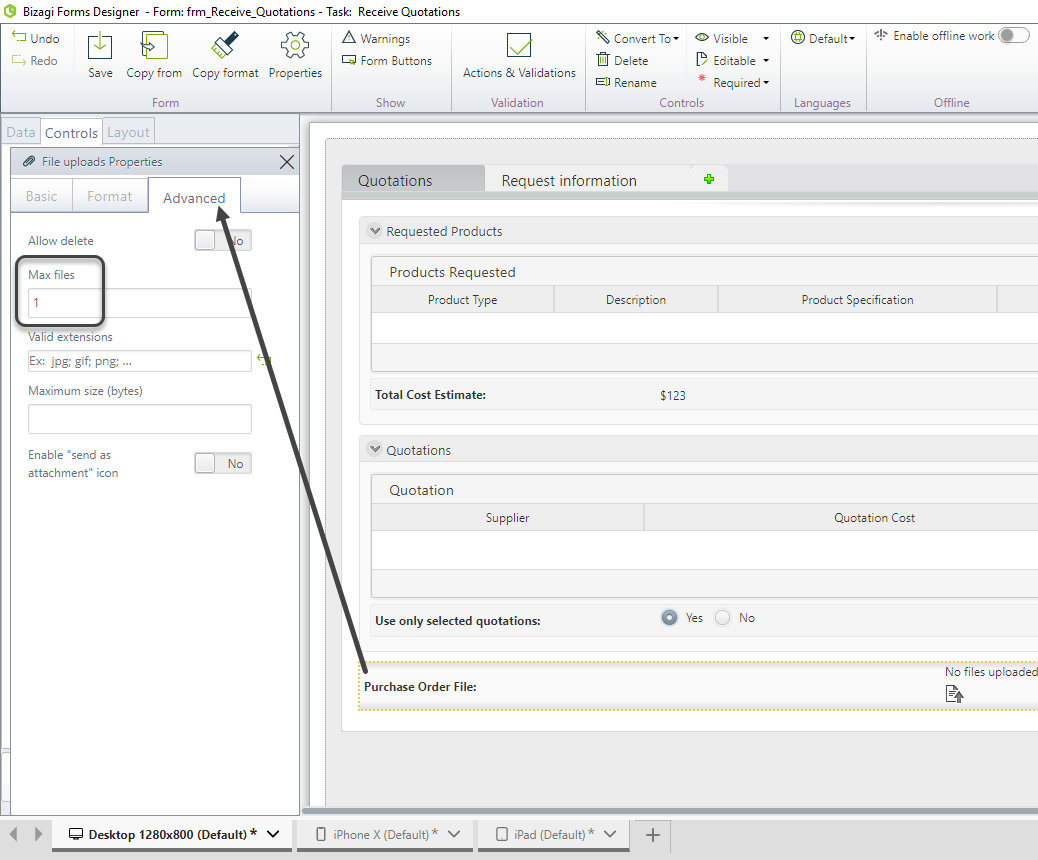
- Go to the Advanced Tab and set Max Files to
-
Restrict Uploads to PDF Format:
- In the Valid Extensions property, type
pdf.
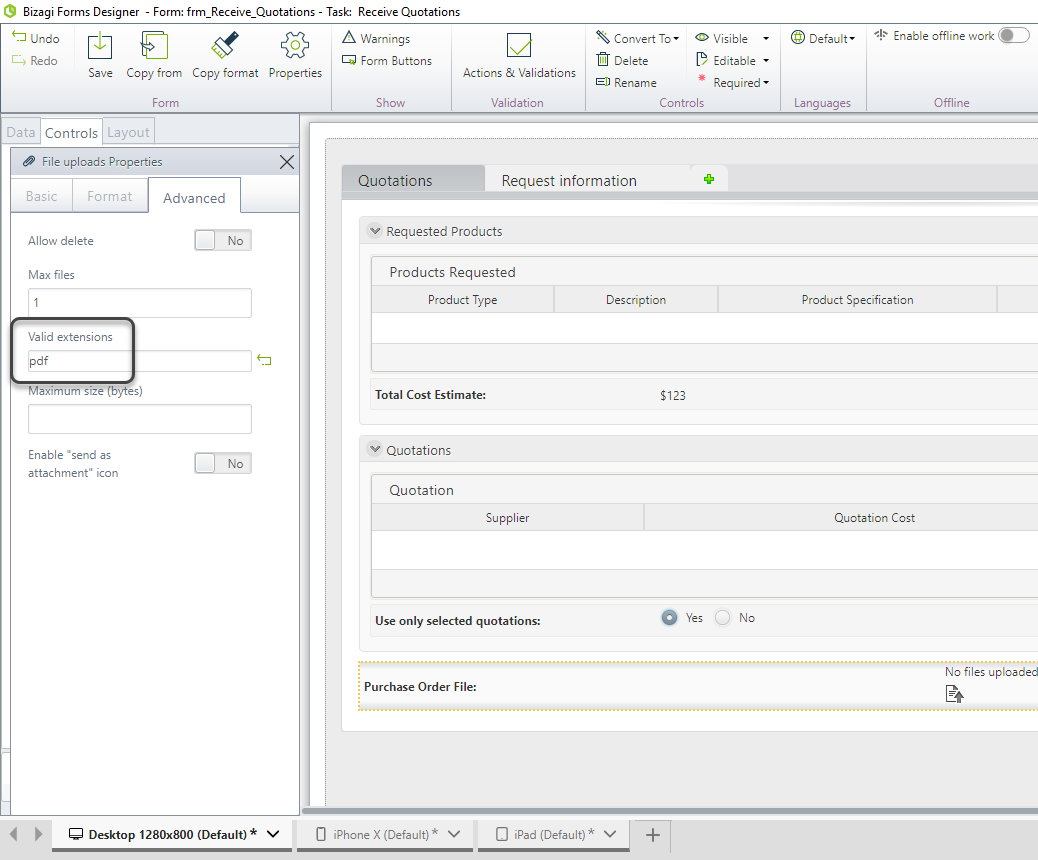
- In the Valid Extensions property, type
-
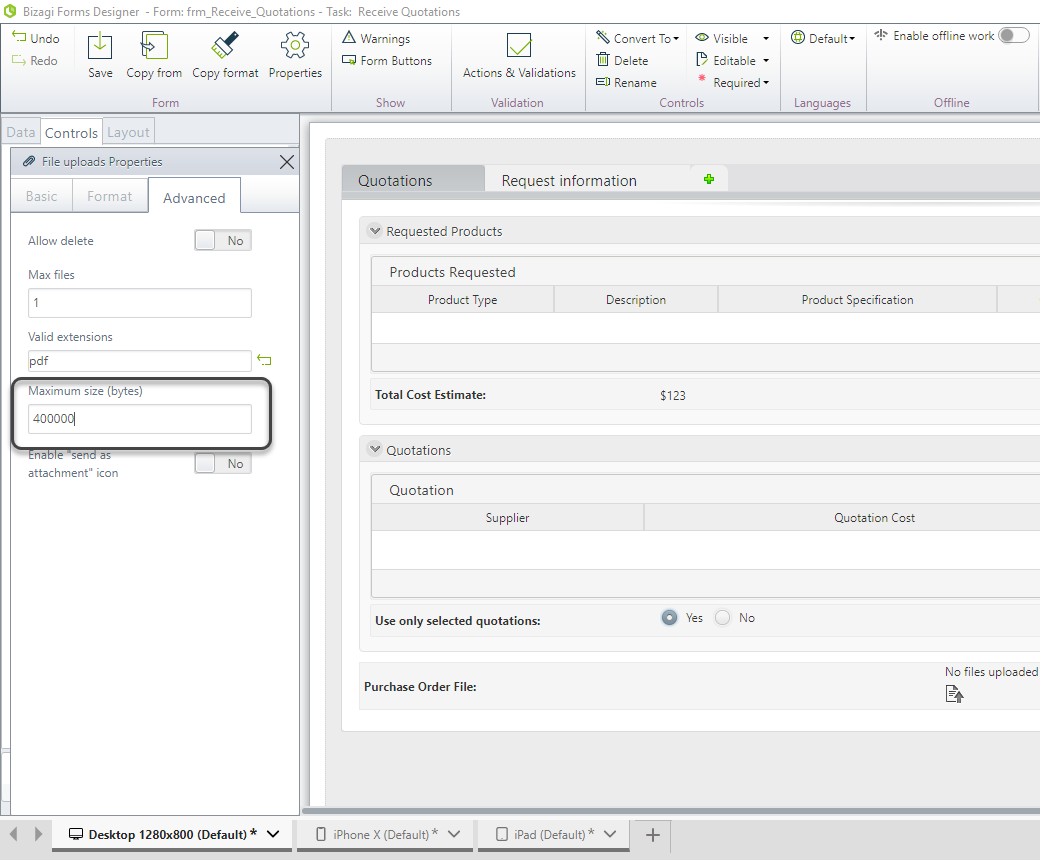
Set the Maximum File Size:
- Define 400000 bytes (~390 KB) in the Maximum Size property.
-
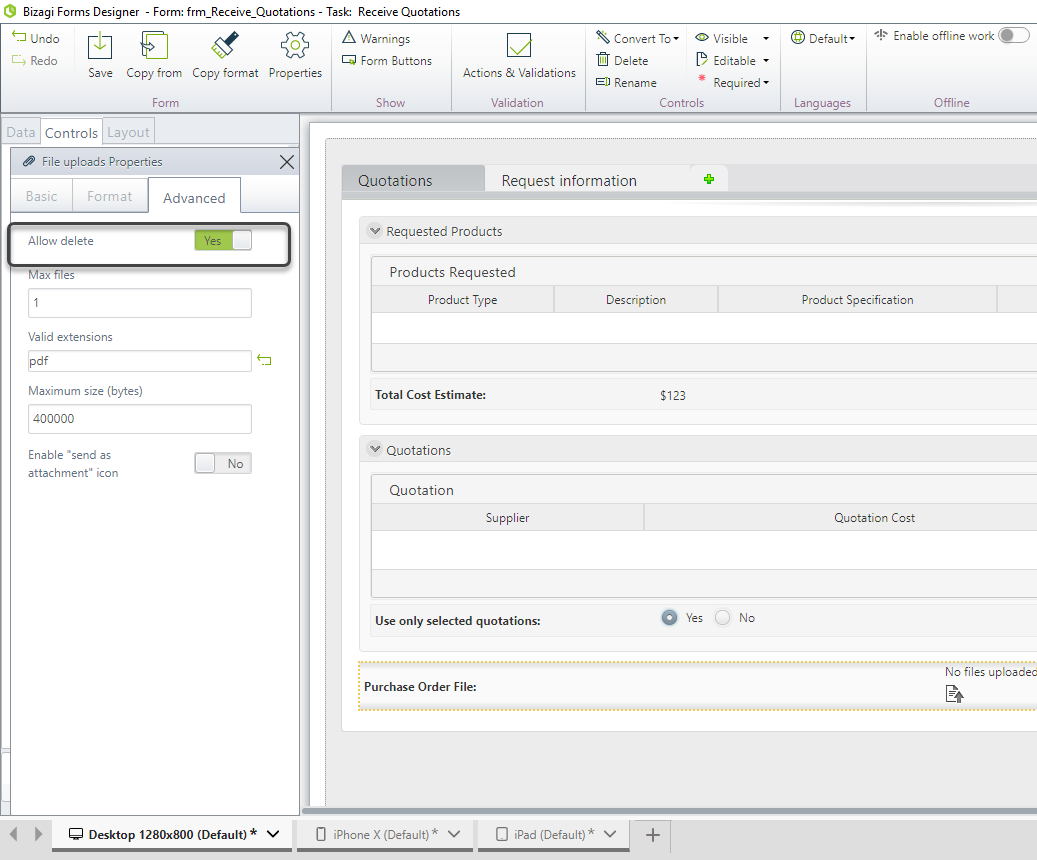
Enable Deletion:
- Enable the Allow Delete property.
-
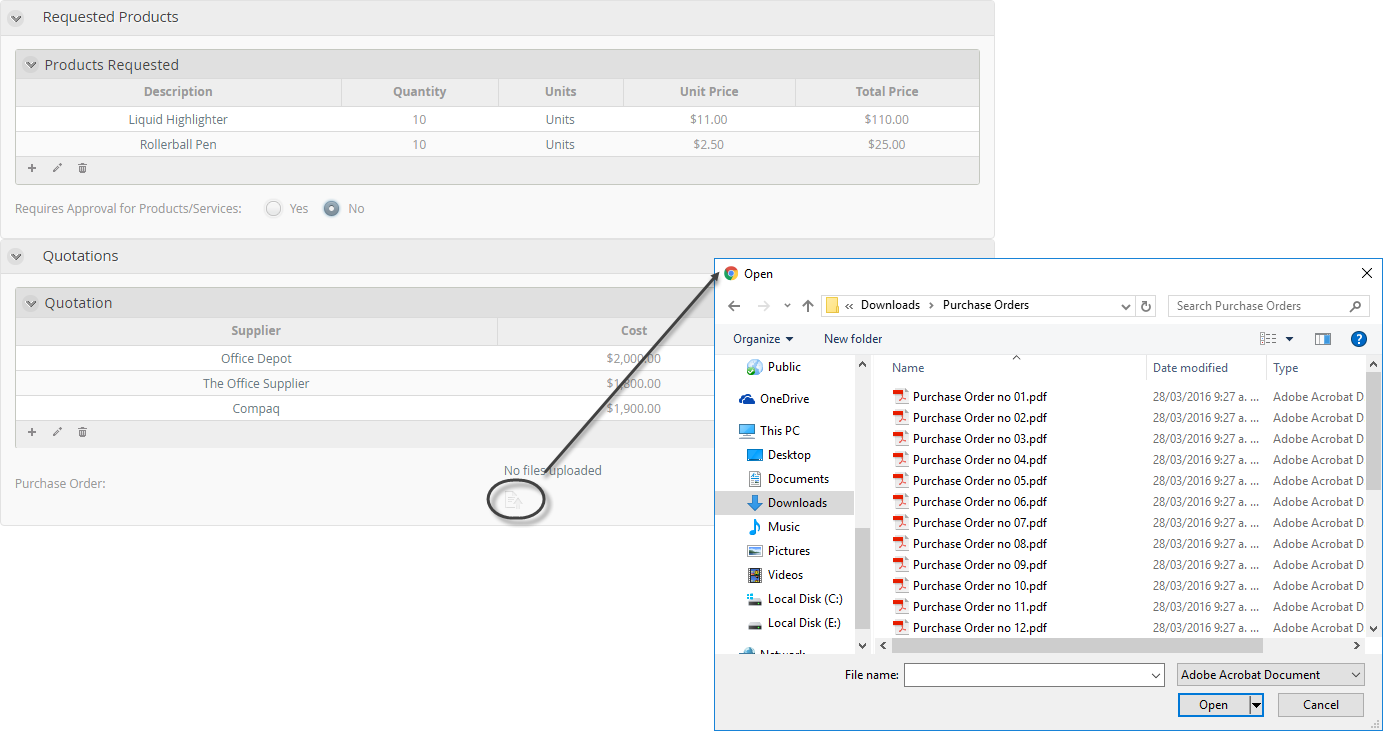
Test the Control:
- Click the Upload icon to attach a file. A window will appear for file selection.
Behavior
-
Once the maximum number of files is reached, the Upload Icon becomes hidden.

-
Only files with the specified extension (
PDF) will be selectable.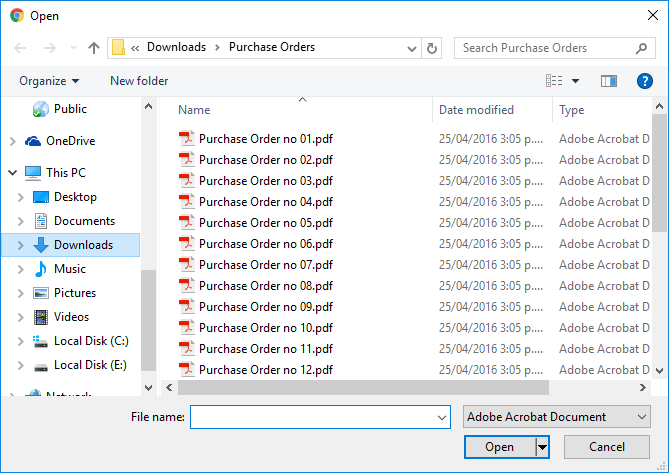
-
If a file exceeds the maximum size, a validation message is displayed.

-
Users can delete uploaded files by clicking the Delete Icon, visible when hovering over the file.